
Budget & DIY Decor / August 31, 2026
Before-and-After Apartment Makeover: A Practical Framework That Measures What Works
Use a practical before-and-after apartment makeover framework to document the real problem, test one change at a time, and measure whether the room works…
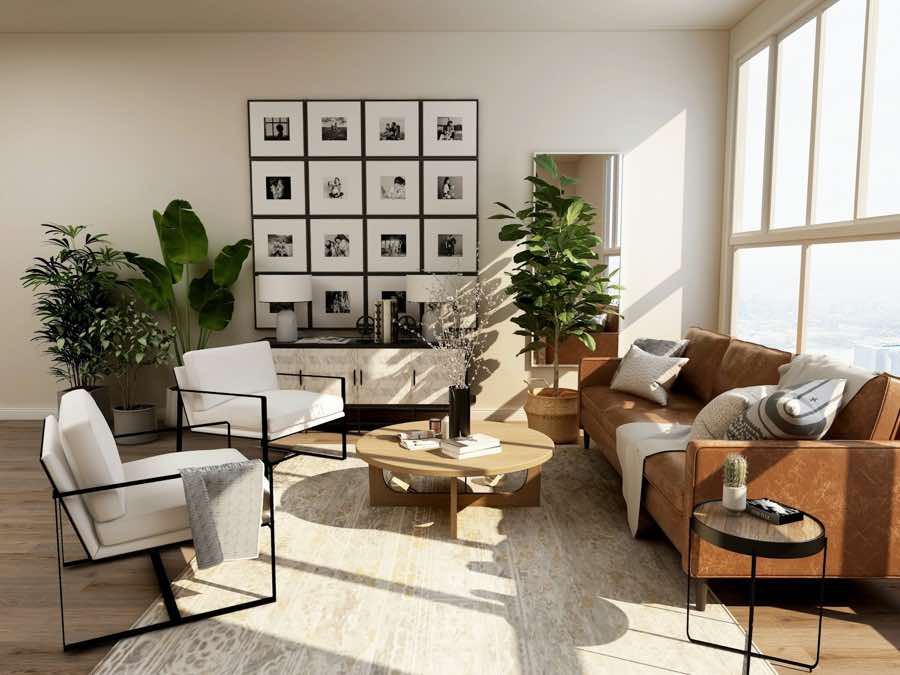 Apartment Lift Up / guide
A before-and-after apartment makeover is most useful when it documents a decision, not just a shopping haul. Photograph the room honestly, identify the biggest problem, make one structural change, then layer lighting, texture, and finishing pieces in that order.
Short answer: use the same camera angle before and after, change one major variable at a time, measure the effect on movement and comfort, and keep a record of what you changed. This turns a pretty comparison into a repeatable framework for any rented or owned apartment.

Why before-and-after projects often mislead
A transformation photo compresses weeks of decisions into two frames. It may hide the budget, the lease restrictions, the amount of storage, the furniture that stayed, or the problems that remain outside the camera. A useful makeover framework keeps those details visible.
The purpose of documenting the process is not to prove that every room can look the same. It is to understand which change produced the improvement. If a room feels better after the sofa moves, the lesson is about circulation. If it feels better after a lamp is added, the issue was probably light. If clutter returns after three days, the missing solution is storage rather than another decorative piece.
Step 1: Photograph the true before
Photograph the room in natural daylight from the doorway or another repeatable position. Take a second photograph at night if lighting is part of the problem. Leave ordinary items in place. Do not remove laundry, cables, mail, or daily tools merely to make the before picture look worse.
- Use the same camera height and angle for the after photo.
- Include the floor, ceiling line, and main walking route.
- Record the room’s width, depth, window position, and door swing.
- Note what must stay because of the lease, budget, or ownership.
- Write down what feels inconvenient at the time you use the room.
Honest documentation gives you a baseline. It also prevents a common mistake: comparing a carefully staged after photo with a cluttered, poorly lit before photo and assuming every improvement came from a purchase.
Step 2: Name one primary problem
Choose the issue with the largest effect on daily life. Common candidates are poor lighting, blocked circulation, visible clutter, furniture scale, lack of storage, or a room that has no clear function. Pick one before choosing products.
When several problems appear connected, find the underlying one. A room may seem cluttered because its storage is too far from where items are used. A room may feel small because the sofa and table block movement. A bedroom may feel unsettled because the overhead light is harsh and every surface is visible at night.
Use a one-sentence test
Complete this sentence: “This room would work better if…” The answer should describe a change in use or feeling, not a product. “If the reading chair had light and a clear landing surface” is more useful than “if I bought a new lamp.”
Step 3: Make one structural change
Start with layout, scale, or one anchor textile. Move existing furniture before ordering new pieces. Pull seating slightly from the wall if the route remains clear, turn a desk toward usable light, define a studio zone with a rug, or remove a piece that blocks a door or window.
Live with the change for at least a day. Use the room as normal. Walk through with a laundry basket, sit in the main chair, open drawers, and carry the objects you use. A layout that looks balanced from the doorway can still fail when the room is used.
Step 4: Layer lighting, then texture
After the layout works, fix the light. Add a task source where an activity happens and a softer source in the area that becomes dark. Use the room after sunset before deciding that the furniture or wall color is wrong.
Texture comes next. A rug, curtain, basket, bedding layer, plant, wood surface, or ceramic object can make the room feel finished without covering every surface. Choose useful textures before decorative ones so the change improves the way the room works.

Step 5: Choose the right after photo
Take the after photo from the same position, at a similar time of day, and with ordinary items still present. You may make the room tidy, but do not remove everything that proves how it functions. Include the light sources, storage, and walking route that were part of the change.
Take detail photos only as supporting evidence. A close-up of a styled shelf can show texture, but it cannot prove that the room has better circulation. Use the wide shot to judge the primary problem and the detail shots to explain the decisions.
How to measure whether the change worked
Visual improvement matters, but a lived-in test is stronger. Write down what became easier, what still annoys you, and what new problem the change created. A larger rug may define the seating area but make a door harder to open. A shelf may clear the desk but make a walking path narrow.
| Question | Evidence to record | What it tells you |
|---|---|---|
| Is movement easier? | Door swings, walking routes, and turns | Whether layout and scale improved |
| Is the room usable after dark? | Where shadows, glare, and dark corners remain | Whether lighting needs another layer |
| Does clutter return? | Where daily items land after use | Whether storage is near the point of use |
| Does it feel calmer? | Noise, visual crowding, and comfort | Whether editing and texture are balanced |
Before-and-after for rental apartments
Renters can document reversible changes especially well. Photograph the wall, hardware, floor, and fixture before installing anything. Save instructions and original parts. Record how long an adhesive, tension product, or removable treatment has been in place, and inspect it according to the manufacturer’s guidance.
A rental before-and-after should include the restoration plan. If the result depends on a painted wall, mounted shelf, or swapped hardware, write down how it will be removed. A transformation is not complete when the after photo looks good. It is complete when the apartment can return to its required condition without an avoidable repair.

Common documentation mistakes
- Changing furniture, lighting, color, and decor all at once.
- Using a different angle or lens for the after photo.
- Removing all daily objects from the after and hiding storage needs.
- Calling a purchased product the solution before testing it in use.
- Ignoring noise, glare, heat, or maintenance because they do not show in a photo.
- Failing to record lease permissions or removal instructions.
A repeatable seven-day makeover test
- Day 1: photograph the true before and write the primary problem.
- Day 2: measure the room and test a free furniture change.
- Day 3: live with the new layout during normal routines.
- Day 4: add or reposition one useful light source.
- Day 5: introduce one anchor textile or storage improvement.
- Day 6: edit the surfaces and photograph the room again.
- Day 7: compare the photos and record what actually improved.
How to show progress without staging the room
Good documentation does not require a perfect image. Remove visual distractions that are not part of the room’s normal use, but keep the objects that explain the space. If cables are always present, show how they are managed. If the room needs a basket for mail, include it. If the work zone shares a dining table, show the transition between uses.
Use a short caption for each image that explains the decision rather than praising the result. “The sofa moved 18 inches forward to clear the balcony path” tells a reader more than “This room feels so much better.” Specific notes make the framework transferable to another apartment with different dimensions and constraints.
Compare the same moments
Photograph the room at the same practical moments: morning light, evening light, work time, meal time, or the point when clutter normally accumulates. A room that looks good only when empty is not the goal. The strongest after image proves that the apartment can support real routines with less friction.
Remember that a before-and-after is a learning tool. The first project may reveal that the main problem is not the furniture but the storage, light, or maintenance routine. Use that information for the next room. Over time, the apartment becomes more cohesive because each change is based on evidence from the way you live.
When the after reveals a new problem
Every improvement changes the room’s balance. A new rug may make the seating area clearer but expose that the coffee table is too wide. A tall shelf may solve storage but reduce light. A brighter lamp may improve work but create glare on a screen. Treat these discoveries as useful feedback rather than failure.
Make one adjustment at a time and record it. Move the table, change the lamp angle, edit the shelf, or shift the rug. Give the room a normal day before making another change. This keeps the project from becoming a chain of reactions where every new purchase is meant to compensate for the previous one.
Build a small project record
Keep the before photo, measurements, permission notes, product instructions, receipts, and after photo together. Add the date, cost, room, problem, change, and result. This record helps with future decisions and is especially useful in a rental when you need to restore a wall, hardware set, or removable product.
A project record also makes it easier to share honest advice. You can explain what worked in a particular room and what depended on its size, light, or lease. That is more helpful than presenting one universal solution for every apartment.
The best outcome is not the most dramatic visual change. It is the room that is easier to walk through, easier to reset, and more comfortable at the hour you use it most. Use the before-and-after framework to make that outcome visible, then carry the lesson into the next room without assuming the same solution will fit.
If the apartment is rented, include the return trip in the record. Note which changes are portable, which need removal, and which require permission. A beautiful after photo and a clean move-out plan can exist together when the project is designed with both moments in mind.
Use the record to compare rooms fairly. A living room may need a wider view, while a bedroom may need a detail of the bed and storage. The camera angle should explain the decision, not hide the practical limits that another reader will need to understand.
A useful project record makes the next apartment lift up faster because it keeps the lessons, measurements, and decisions in one place.
Before-and-After Apartment Makeover: Test the First Change
A before-and-after apartment makeover becomes more useful when the first change is measurable. Photograph the room, record the problem, and test layout before shopping.
Frequently Asked Questions
How do I take better before-and-after apartment photos?
Use the same angle, camera height, lens, and comparable lighting. Keep daily-use items visible enough to show whether the room still functions.
How many things should I change at once?
Change one structural variable first, then layer lighting, texture, and accessories. This makes it easier to understand what helped.
What should I photograph in a rental?
Photograph walls, floors, hardware, fixtures, and the area around any removable installation. Keep the images with your lease and product notes.
How long should I test a new layout?
Use it through normal routines for at least a day, and preferably a week when the change affects storage or movement. Daily use reveals problems a doorway view cannot.

Useful Sources And Verification
This article offers general home-planning guidance. Verify lease rules, product instructions, and any safety requirements for your building before acting.